

TestNG scripts can be written using any Java-supported IDE. The most commonly used IDEs for Java development include Eclipse, IntelliJ IDEA, and NetBeans.
In this tutorial, we will focus on configuring the TestNG framework in Eclipse and IntelliJ IDEA.
Install Java Development Kit (JDK)
Download and install the Java Development Kit (JDK) from the official Oracle Website or use an open-source version like OpenJDK. After installation, configure the JAVA_HOME environment variable and update the PATH variable to include the JDK binaries. For a more detailed tutorial of JDK installation, refer to this link: Java Installation.
Set up an IDE
After installing Java, the next step is to choose a tool for writing code. While a basic text editor allows you to write code, an Integrated Development Environment (IDE) provides additional features like code completion, debugging, and build tools, which will be useful for writing and running Selenium test scripts. Popular options include IntelliJ IDEA and Eclipse. Download and install your preferred IDE from its official website.
IntelliJ IDEA download page: https://www.jetbrains.com/idea/download/
Eclipse download page: https://www.eclipse.org/downloads/
Once the IDE is installed and ready, the next step is to create a new Java project and configure TestNG.
TestNG Configuration in Eclipse
To create and execute TestNG scripts in Eclipse, the TestNG plugin must be installed via the Eclipse Marketplace. Follow the steps below:
1. Launch the Eclipse IDE.
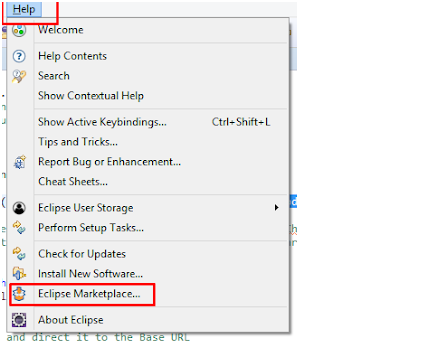
2. Go to the Help menu and select Eclipse Marketplace.
3. In the search bar, type “TestNG” and press Enter.
4. Locate “TestNG for Eclipse” in the search results.
5. Click the Install button.

6. Follow the installation prompts. Once the installation is complete, a popup will appear asking to restart Eclipse.
7. Click Restart Now to apply the changes.
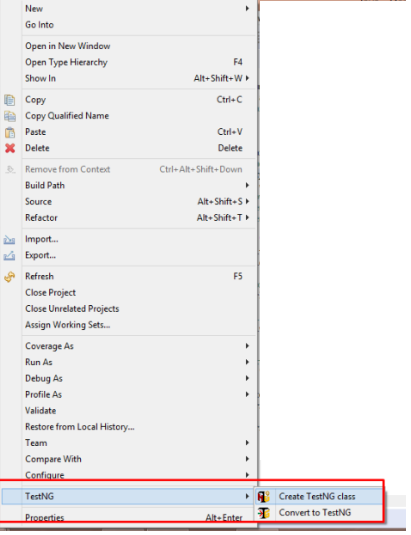
8. After restarting, verify the installation:
(i) Go to File > New > Other
(ii) Search for TestNG class
(iii) If it appears in the list, the plugin has been installed successfully.
TestNG configuration in IntelliJ Idea:
In IntelliJ IDEA, the TestNG plugin is included by default, so executing TestNG scripts is supported out of the box. However, to use TestNG in a Maven or Gradle project, the dependency must be added manually.
Adding TestNG to the Maven Project
To add TestNG as a dependency in a Maven project:
1. Search for TestNG Maven Dependency in your browser or directly go to the Maven Repository.
2. Navigate to: Home » org.testng » testing.
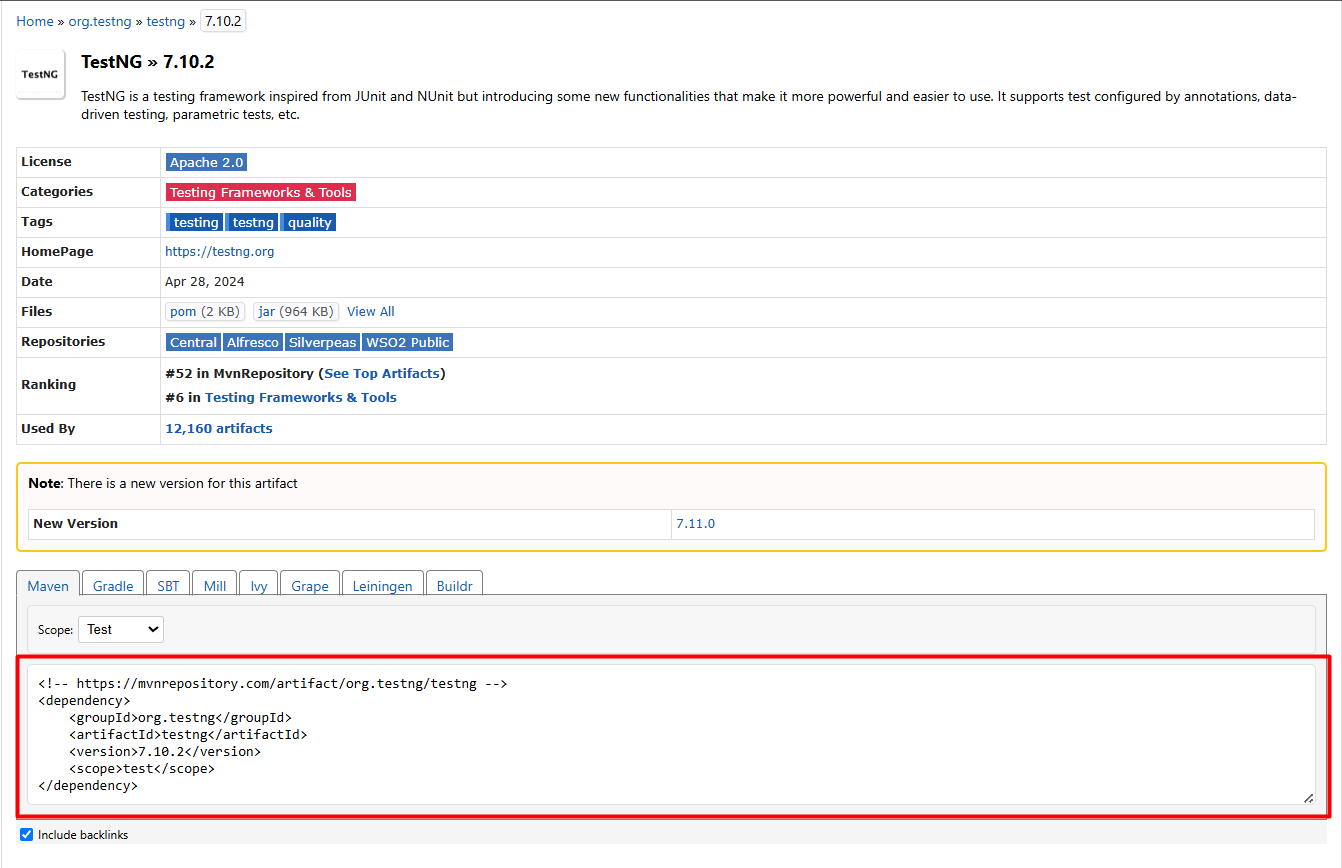
3. Choose the latest stable version and open its details page.
4. Copy the provided Maven dependency snippet.
Now, open IntelliJ Idea:
1. Click File > New > Project
2. Enter the Project Name and choose the Project Location
3. Select Build System as Maven and click Create
4. Open the pom.xml file
5. Paste the TestNG dependency inside the
Note: You may need to restart your IDE or reload the Maven project to trigger dependency downloads.
Sample pom.xml with TestNG
Adding TestNG in a Gradle Project
To add TestNG in a Gradle project:
1. Go to Maven Repository and search for TestNG.
2. Navigate to Home » org.testng » testng.
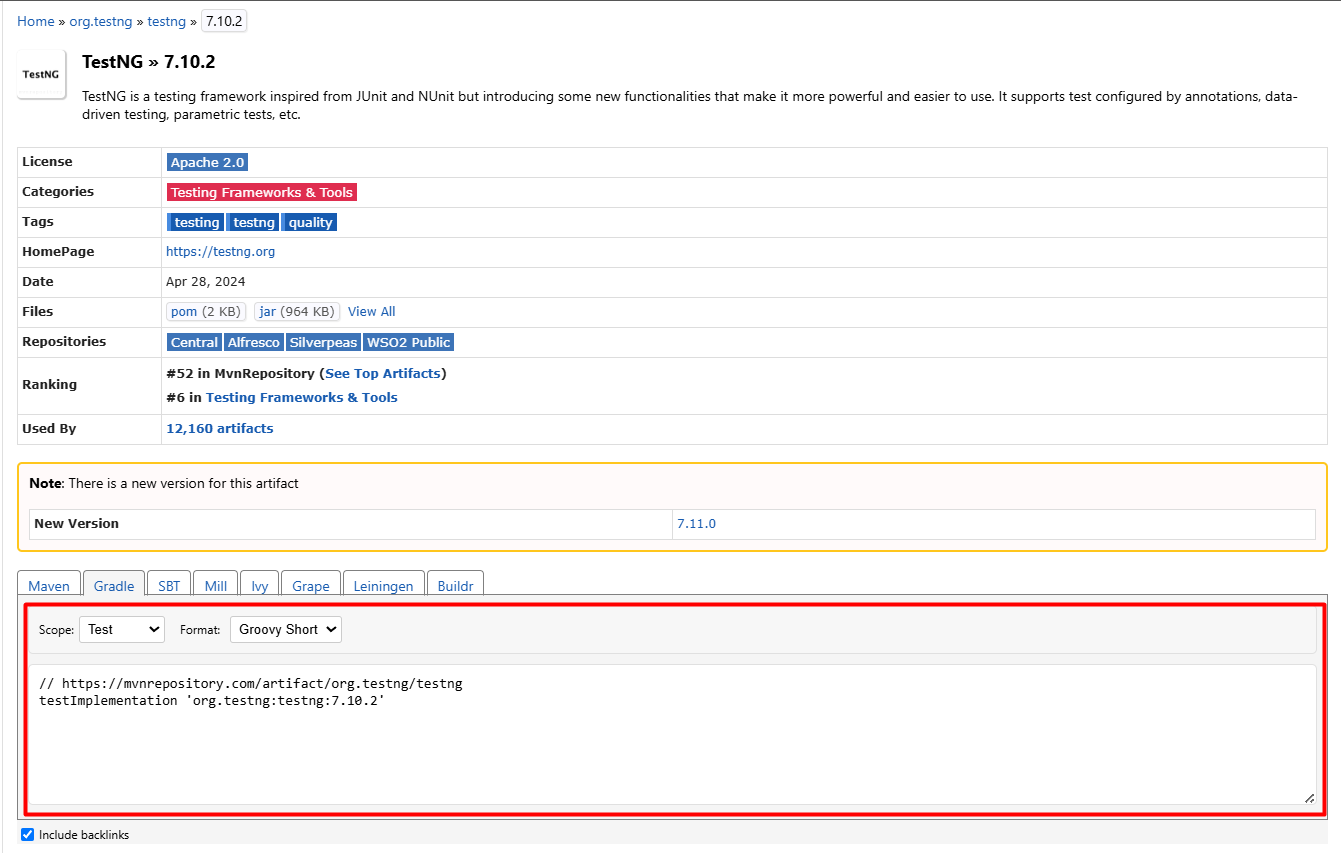
3. Select the latest stable version.
4. On the version page, switch to the Gradle tab and copy the snippet.
Now in IntelliJ IDEA:
1. Click File > New > Project
2. Provide a Project Name > Select the Project
3. Provide the Project Name and choose the Location
4. Select Build System as Gradle and click Create
5. Open the build.gradle file
5. Paste the dependency inside the dependencies block
Sample build.gradle with TestNG
This is how TestNG is added to a Java project. In upcoming tutorials, we will learn about TestNG features such as TestNG Annotations, TestNG Assertions, TestNG Attributes, and TestNG Data Providers. These are used for controlling test execution, validating results, customizing test behavior, and running tests with multiple data sets.