

To use Cucumber in a Java project, start by creating a Maven-based Java project. Ensure JDK is installed, and your IDE (like IntelliJ or Eclipse) is set up for Maven.
Once the base Java project is ready, add the required Cucumber dependencies.
To know in detail about setting up a Java project for automation testing, follow this link: Selenium WebDriver Setup in Java Project
To Add Cucumber in Eclipse
1. Click on Help > Eclipse Marketplace.
2. Find Cucumber and Click Install
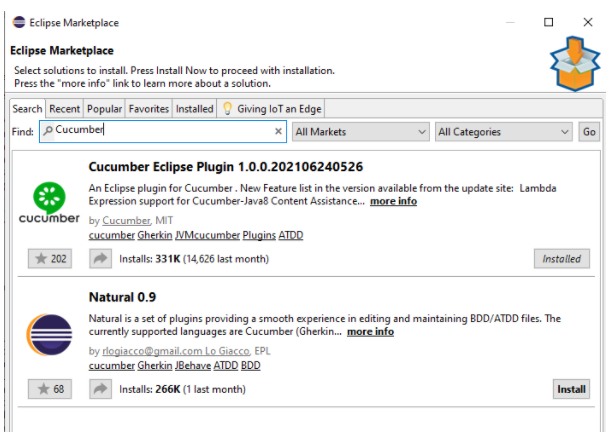
3. We will get the pop-up to accept the license in the Review License pop-up and then click Finish.
4. Create Maven Project File > New > Project > Maven Project.

Click Next and Select the checkbox “Create a simple project” > Click Next.
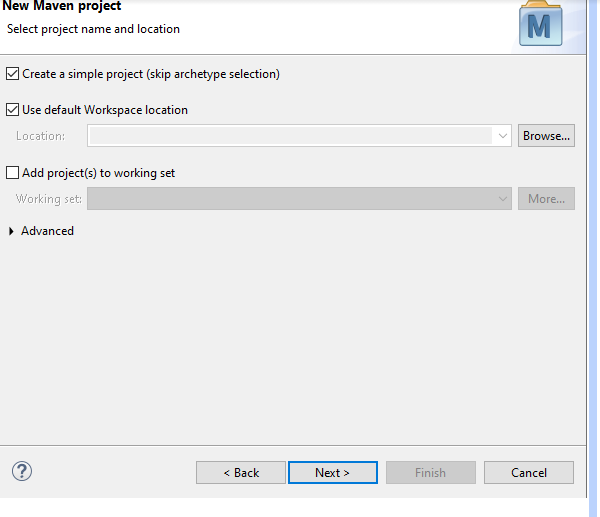
Enter Artifact id as "CucumberSelenium" and group ID as "CucumberSelenium" and leave the remaining field as it is > Click Finish > Maven Project created.
Structure of Project created and looks like this -:
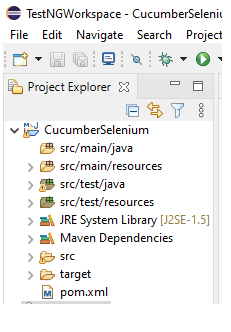
Now, we need to add a dependency for Cucumber in pom.xml . Always install the latest version ,
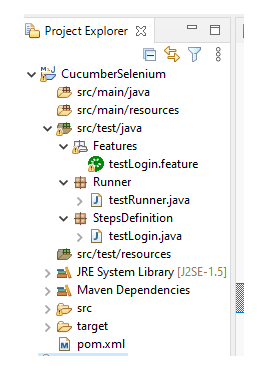
5. Let's create three packages for feature, step definitions, and runner. Create those packages under src/test/java, the name is Features, Runner, and StepsDefinition.
6. Create file under feature package > right click > New > Other > File > Enter name of file “testLogin.fetaure”.
7. Create java class testLogin.java under package StepsDefinition.
8. Add the JUnit testrunner.java class under package Runner, to run the feature files and their respective code.
Now our structure is ready to write and execute code. Here is the basic structure:
To Add Cucumber in an IntelliJ Project
1. Open IntelliJ IDEA
2. Navigate to: File > New > Project
3. Enter a Project Name and select the Project Location
4. Choose Maven as the build system
5. Search for the following Maven dependencies online or at mvnrepository.com
cucumber-junit
cucumber-core
cucumber-java
6. Copy the dependency XML snippets and paste them inside the
7. After adding the dependencies, reload the Maven project from the IDE or run the command:
mvn clean install