

In the Previous section, we have seen the fundamental concepts. Let’s put everything together and create, run, and understand your first Robot Framework test.
We’ll automate a scenario in the QA Feast Demo Site.
Step 1: Open Your IDE and Create a New Project
- Create a new folder in your machine.
- Open VS code, then open the created folder in VS Code.
- If the robot framework and selenium library is not installed, install both
- Install Robot framework: pip install robotframework
- Install SeleniumLibrary: pip install robotframework-seleniumlibrary
- Create a new directory named tests in the project.
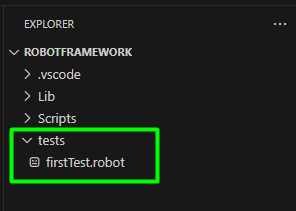
Step 2: Add the Test Code to firstTest.robot
Create a new file with .robot extension. And write test on it.
Understanding the Test
Let’s break down each section and keyword:
|
Section / Keyword |
Description |
|
*** Settings *** |
Imports external libraries (here, SeleniumLibrary). |
|
*** Variables *** |
Stores reusable values like URL and browser type. |
|
*** Test Cases *** |
Contains the actual test logic and steps. |
|
Open Browser |
Opens the specified URL in the selected browser (Chrome). |
|
Maximize Browser Window |
Maximizes the window for better visibility. |
|
Wait Until Element Is Visible |
Waits until the given element appears before interacting. |
|
Click Element |
Clicks on a specific element (like a button or menu item). |
|
Click Link |
Clicks on a hyperlink element by its visible text. |
|
Input Text |
Types the specified text into a text box. |
|
Close Browser |
Closes the browser after completing the test. |
|
[Documentation] |
Provides a short description of what the test does. |
In short, this test:
Opens the QAFeast website → accepts cookies → navigates to Demo Site → types text into a textbox → and closes the browser.
Step 3: Running the Test from Command Line (CMD)
- Open your terminal or Command Prompt.
- Navigate to your project folder: cd robot-tests/tests
- Run the test: robot firstTest.robot
Step 4: Running the Test from IDE
If using VS Code:
- Install the extension “Robot Framework Language Server”.
- Open your .robot file.
- Right-click inside the test and select Run Current Test.
(or press Ctrl + Shift + P → type “Robot Framework: Run Test”)
If using RIDE IDE:
- Open the .robot file.
- Select the test case.
- Click the Run (green play button).
Step 5: Understanding the Output Files
After the test execution, Robot Framework automatically generates three output files in the same directory:
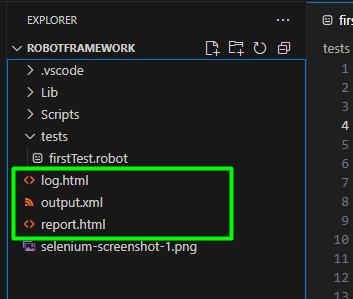
log.html - Detailed keyword-level log showing every executed step and possible screenshots.
output.xml - Raw execution data (used internally by Robot Framework).
report.html - High-level summary showing total tests, pass/fail counts, and execution time.