

An Android Emulator is a virtual Android device that runs on your local computer or a cloud machine, allowing you to simulate real devices for testing without using physical hardware.
An Android Virtual Device (AVD) defines the hardware and software configuration of the emulator, such as device type, Android version, screen size, and more.
You can create and manage AVDs using the Device Manager in Android Studio on your windows machine.
Part 1 – Install & Configure Android Emulator
1. Install Android Studio
1. Download the latest version of Android Studio .exe file from: https://developer.android.com/studio
2. Run the installer and follow the Setup Wizard.
3. When prompted, install all recommended SDK packages.
2. Set ANDROID_HOME Environment Variable
1. In your Windows machine, open System Properties → Advanced → Environment Variables.
2. Under User variables (or System variables), click New.
3. Set:
- Variable name: ANDROID_HOME
- Variable value: Path to your Android SDK folder (e.g., C:\Users\
4. Add the following to your PATH variable:
- %ANDROID_HOME%\platform-tools
- %ANDROID_HOME%\tools (optional for older versions)
Note: In many cases, Android Studio sets this automatically, but it’s good to verify.
3. Install Required SDK Packages
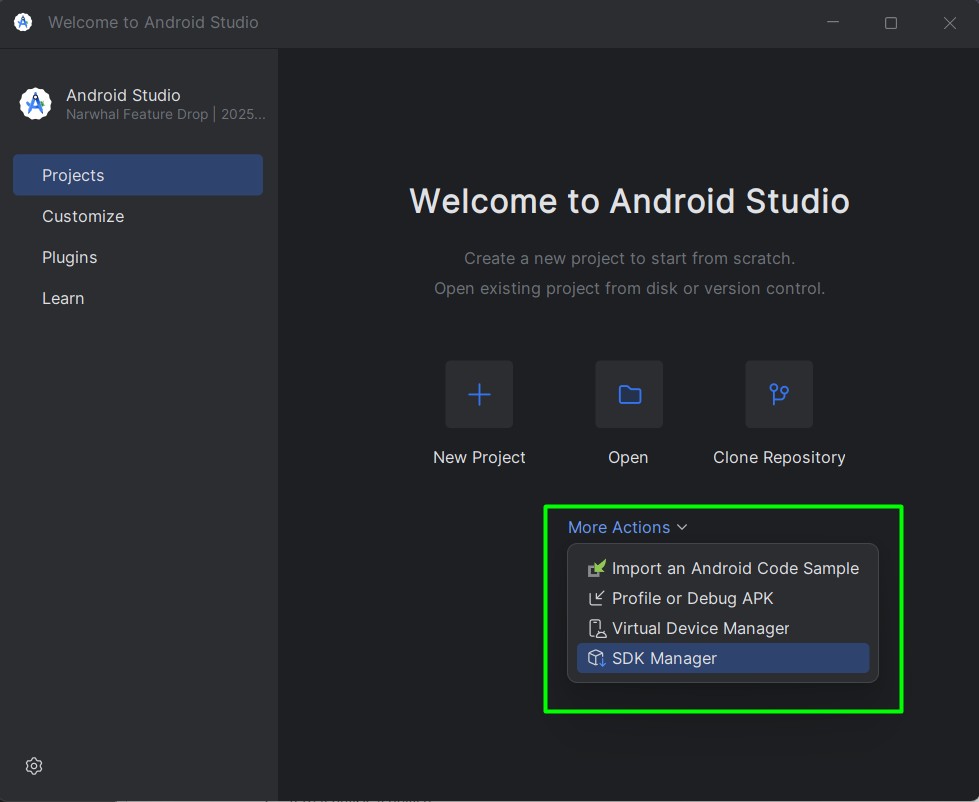
1. Launch Android Studio.
2. Go to Welcome Screen → More Actions → SDK Manager
3. In SDK Platforms tab, Select required Android verision for testing.

4. Go to SDK Tools Tab.
5. Select Android SDK Build-tools
- Android SDK Platform-Tools
- Android Emulator
- Intel x86 Emulator Accelerator (HAXM installer) (Intel CPUs only) or Android Emulator Hypervisor Driver for AMD Processors (AMD CPUs)
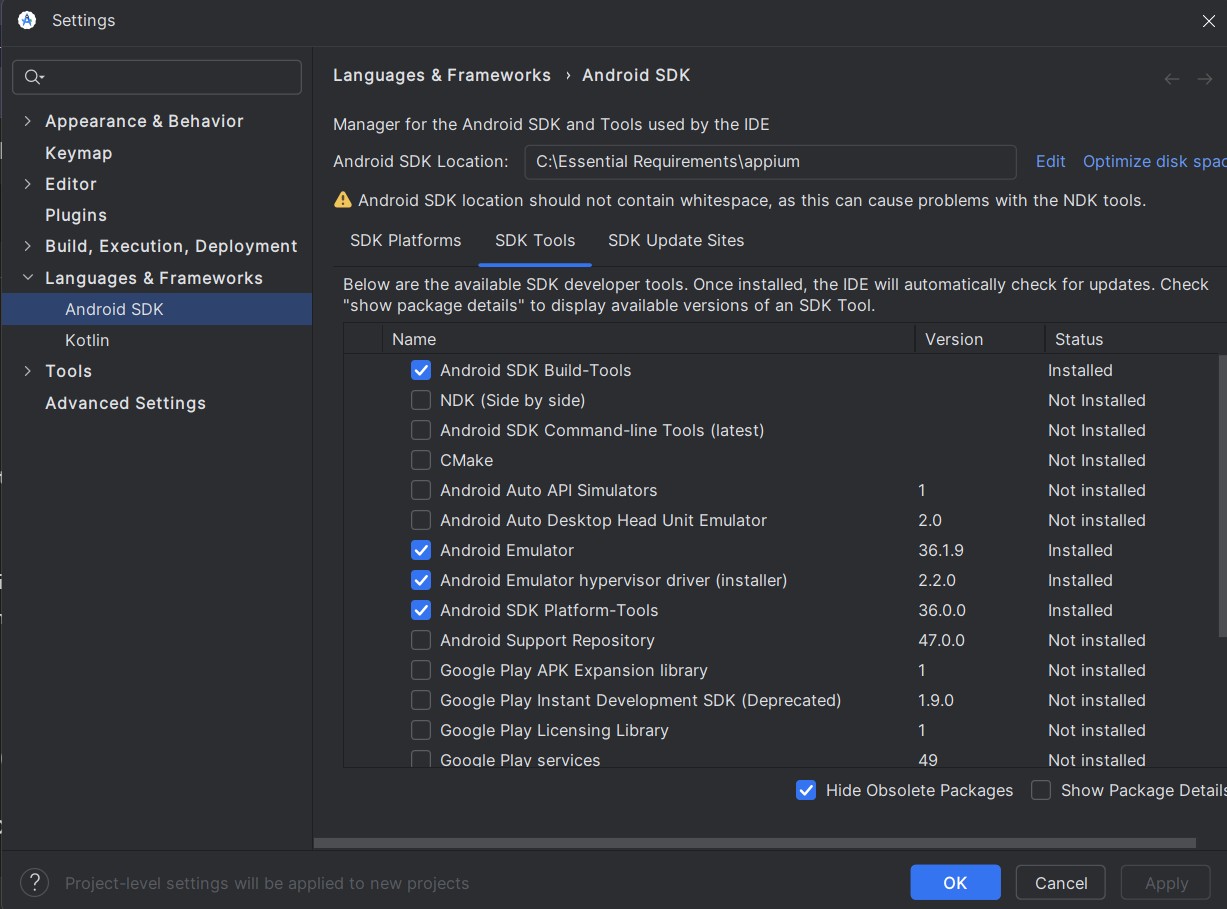
6. Click OK to install
3. Create an Android Virtual Device (AVD)
1. In the Android Studio Home page, click More Actions > Virtual Device Manager.
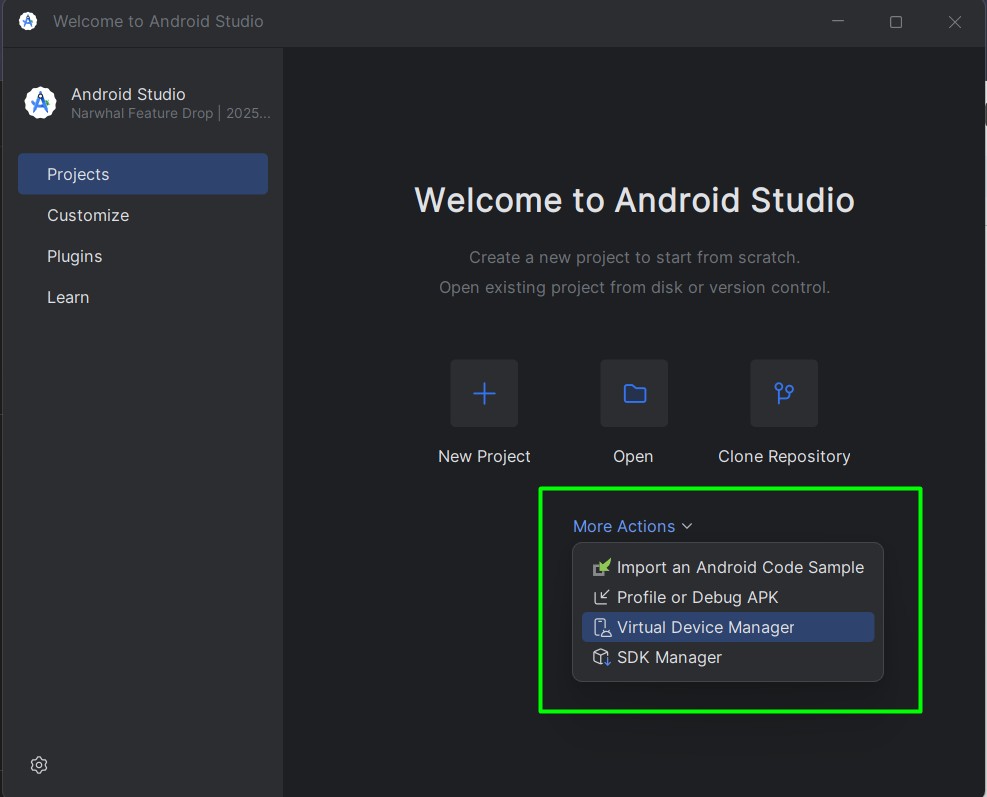
2. Click + Create Device.
3. Choose a hardware profile (e.g., Pixel 6) or create/import a custom profile.
4. Select a System Image:
5. Choose the x86_64 image with Google APIs for better compatibility.
6. Click Finish
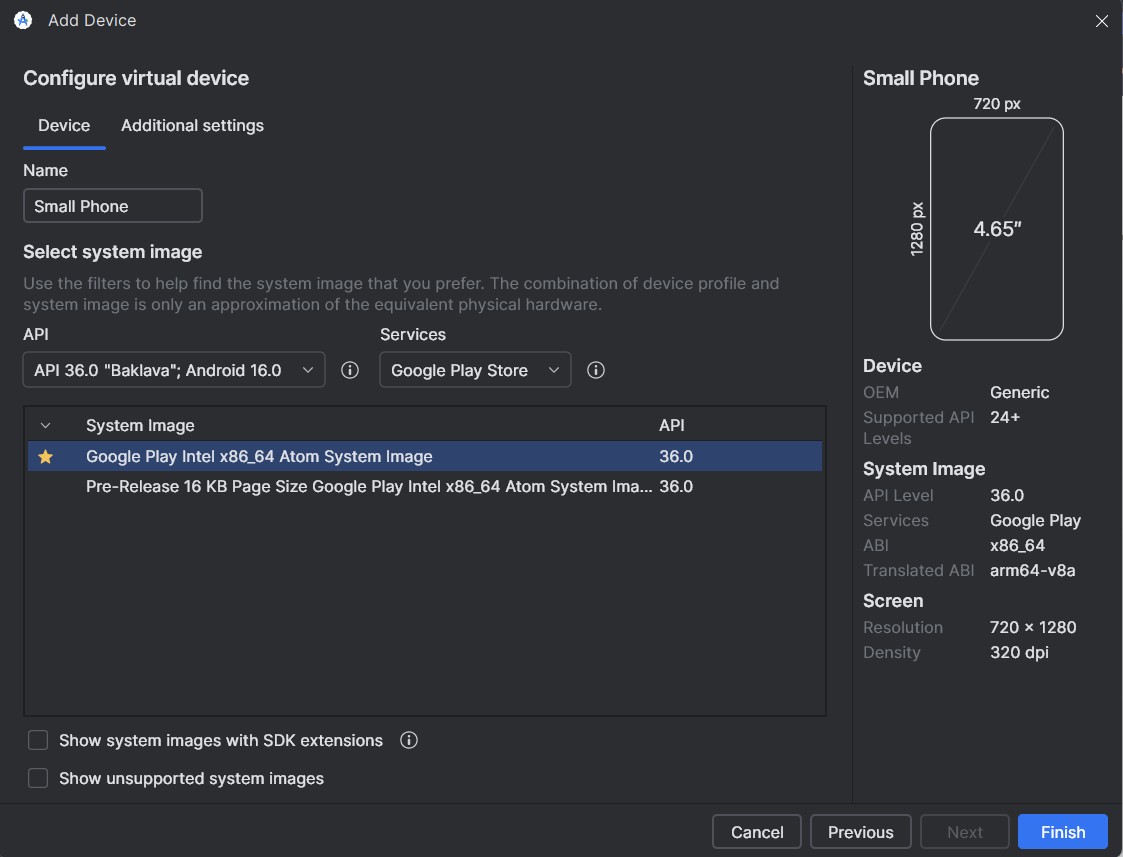
7. An device will be created, Click Play Icon, Android device will be launched.
Part 2 - Verify Emulator Connection in Local Machine
Before using Appium, make sure the emulator is detected:
Execute the command in CMD: adb devices
You should see the newly created device. (e.g., emulator-5554 device)
Part 3 - Connecting Android Virtual Device to Appium
1. Start Appium Server
If using Appium Server GUI → click Start Server (default: 127.0.0.1:4723).
If using CLI, enter command in CMD: appium
2. Launch Appium Inspector
Open Appium Inspector.
Set Remote Host = 127.0.0.1, Port = 4723.
3. Add Device Capabilities in JSON Representatio
You can check running apps and activities via: adb shell dumpsys window | find "mCurrentFocus"
4. Start the Session
Click Start Session in Appium Inspector.
The Inspector will load an interactive hierarchy of the emulator’s current screen.
